Table of Contents
Easy Moonlight Landscape Acrylic Painting: Create Your Own Enchanting Night Sky
Hey everyone! I hope you’re all well. This is an easy moonlight landscape acrylic painting for beginners. I hope you enjoy this simple acrylic painting.
Are you ready to embark on a creative journey under the moonlit sky? In this article, we’ll explore the world of easy moonlight landscape acrylic painting. Whether you’re a seasoned artist or just starting with acrylics, we’ll guide you through the process step-by-step, making the experience both enjoyable and rewarding. So, grab your brushes, unleash your imagination, and let’s paint a mesmerizing moonlit scene together!
Moonlight Landscape Acrylic Painting Steps
Introduction:
One of the most popular uses for acrylic paint is for creating simple moonlight landscapes. When painting a moonlit landscape, it is important to keep a few things in mind in order to create a realistic and effective painting.
First, it is important to choose the right colors. When painting a moonlit landscape, it is important to use colors that will reflect the moonlight. Some splendid colors to use for this purpose include white, silver, blue, and green. It is also important to use a light touch when applying these colors, as too much color can make the painting look unrealistic.
Next, it is important to consider the values in the landscape. When painting a moonlit landscape, it is important to make the lightest areas of the painting the brightest and the darkest areas in the darkest. This will help to create a sense of depth and dimension in the painting.
Finally, it is important to add details to the painting. When painting a moonlit landscape, it is important to include features such as trees, rocks, and other objects that will help to create a realistic and effective painting. By including these details, you will help to create a moonlit landscape that is both realistic and beautiful.
Now, let’s explore it in more details:
Embrace the Night: Preparing Your Canvas for Moonlit Magic
Before we dive into the moonlit landscape, let’s prepare the canvas to set the stage for our night sky masterpiece.
Choosing the Right Canvas Size:
As an artist, I’ve found that the size of the canvas can influence the mood of your painting. For an easy and immersive experience, consider using a larger canvas to give yourself plenty of room to work with. I love working on a 16×20-inch canvas for my moonlight landscapes, but feel free to choose a size that feels comfortable to you.
Adding Texture to the Canvas:
For an extra touch of magic, I like to add a hint of texture to the canvas. You can achieve this by applying a thin layer of gesso or acrylic modeling paste with a palette knife. Let your imagination guide you as you create subtle ridges or patterns that will add dimension to your painting.
Diving into the Night Sky: Background and Moon
Now that our canvas is ready, it’s time to bring the night sky to life. Let’s start with the background and the mystical moon.
Setting the Mood with Colors:
As we paint the night sky, think about the emotions you want to convey. Personally, I love using a mix of deep blues and purples to create a sense of mystery and wonder. Experiment with blending different shades to achieve the perfect night sky hue that resonates with you.
Adding the Moon’s Glow:
The moon is the heart of our moonlit landscape. To create a radiant glow, I like to start by sketching a gentle circle using a pencil or charcoal. Then, using a soft brush, apply a layer of white or off-white acrylic paint to fill the circle. For an ethereal effect, blend the edges of the moon to give it a soft, glowing appearance.
Shimmering Stars: Bringing the Night to Life
No moonlit landscape is complete without a sky full of shimmering stars. Let’s add a touch of magic to our painting.
Twinkling Stars with Splatter Technique:
Creating stars can be a lot of fun and add an extra layer of enchantment to your artwork. One of my favorite techniques is the splatter method. Load a toothbrush with white acrylic paint and gently flick your fingers over the bristles to create tiny splatters across the sky. Be sure to practice on a separate sheet before trying it on your painting to control the intensity.
Constellations and Personal Touch:
For a personal touch, consider adding your favorite constellations to the night sky. This is where you can let your creativity shine! Use a fine brush to draw the constellation patterns with white or silver paint. You can even add your zodiac sign or a meaningful constellation that holds a special place in your heart.
Bringing Earth to Life: Adding the Landscape
Our night sky is taking shape, but it’s time to ground our moonlit landscape with a captivating scene below.
Silhouettes in the Moonlight:
One of the easiest ways to create a moonlit landscape is by using silhouettes. With black acrylic paint, paint the silhouette of trees, mountains, or any elements that resonate with your vision. The contrast against the luminous night sky will add drama and depth to your painting.
Moonlit Reflections:
If you’re painting a landscape with water, add a touch of realism by creating moonlit reflections on its surface. Lightly dip your brush in white paint and gently stroke it along the water’s edge. This will create a soft, reflective glow that mirrors the moon’s radiance.
A Personal Touch: Making It Your Own
Now that we have our easy moonlit landscape taking shape, don’t be afraid to add your personal touch and make it uniquely yours.
The Final Glow: Enhancing Highlights and Details
As we near the end of our moonlit landscape acrylic painting, it’s time to enhance highlights and add those final touches that bring the entire piece to life.
Emphasizing the Moon’s Glow:
To make the moon shine even brighter, use a small brush to add a few highlights of pure white to its surface. This will give it an extra touch of luminescence, making it the focal point of your artwork.
Creating Depth and Dimension:
For added depth, carefully darken certain areas of the landscape and sky. Use a mix of dark blues, purples, and blacks to create shadows and bring out the contrast. This will make your moonlit landscape appear three-dimensional and draw the viewer into its enchanting world.
Time to Shine: Sealing Your Masterpiece
Congratulations! You’ve completed your easy moonlit landscape acrylic painting. To ensure your masterpiece endures for years to come, consider sealing it with a varnish or acrylic fixative.
Varnishing the Painting:
Using a soft brush, apply a layer of acrylic varnish or fixative over the entire painting. This protective coat will guard your artwork against dust, moisture, and fading, preserving its brilliance for generations to come.
Sharing the Magic: Displaying Your Moonlit Landscape
Your easy moonlit landscape acrylic painting is ready to shine! Now, it’s time to showcase your masterpiece and share its enchanting beauty with the world.
Selecting the Right Frame:
Choose a frame that complements your painting and enhances its overall appeal. A simple black or dark wooden frame can add a touch of elegance, allowing your moonlit landscape to take center stage.
Some more curated Easy Moonlight Landscape Acrylic Painting videos
[content-egg module=Youtube]
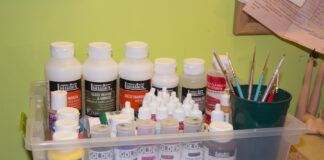
Product used to create landscape acrylic painting:
12×12 inch canvas
Titanium White by Winsor & Newton
Coral Red
Pastel Blue
Mars Black
Nobel brush 3/10
Royal-Langnickel Square Brush size 6
[content-egg module=AmazonNoApi]












I tried it yesterday and I loved the result!!❤️
Its to hard for 8 to 9 years to do this painting
I made this painting very nice,but i can’t make the reflection
Can we paint it in A4 size paper instead of Canvas??
Wow…just wow😍😍😍
I tried this…its awesome… My frends and family appreciated me alot.. Thank you for this tutorial..
Is blending depend upon brush 🤔
Awesome thanks for sharing this video
tell me the name of the board name
The final product doesn’t look as easy as it was to make
Wow that’s awesome thanks for sharing
Amazing
I tried this, it’s beautiful, after drawing this my confident level increased, thank you dear 🥰🥰😍
The background sound 😍 👌 so relaxing
Nice painting
I’m 8and I did it
Nice drawing
I tried it was outstanding
Tried this, turned out well. Thanks. Yours is amazing.
Can I use poster colours
https://youtu.be/3pxMzOMLyCc
really amazing painting
I tried to make my painting exact like 👆🏻like this one but I wasn’t able to do so 😕😞
0:19b this is not fair
I made it, and it turned out really very well!!
Super and beautiful tutorial painting ❤❤
I need to pee every time I watch these … but worth it for the great guidance thank you 😁
it reminds me of dream poo!!!!!!
Which paint brush you use while making leaves of trees because I not understand that
Wowww
Watching people paint is just really calming for me
Pretty easy, it’ll take at least 30 minutes from my life time to draw this masterpiece… Really great
Masha Allah so beautiful ❤️
what liqid in glass water or any chemical?
Amazing content
Nice drawing
Thanks my 6 year old loved doing this one!
Thanks,I made it yesterday ,
it’s beautiful and easy ….appreciate
🙏🏽
I made this it’s very easy and nice!
Beautiful 🤩
is the taped canvas a square or rectangle I’m having an argument with my BFF with it
Thank you so much. You’re my first teacher in painting. 🙏🙏 The painting came out amazing.
Wow are you in the rainforest? I was getting sleepy listening to the rain. O and the painting is beautiful ❤️
i just made it and this is my best painting ever , thank you for this !
Thanks for sharing
Wow I just…. this is a masterpiece. You go man 😇😇
Awesome 😍🔥
No problem you are very talented 👏 great job.
This painting was to easy. I am just before my exams.
Fun fact – Mere Exam M bs 2 hours hi rhte aa
Background music….just wow…..